# 38.用Vue3.0 写过组件吗?如果想实现一个 Modal你会怎么设计?
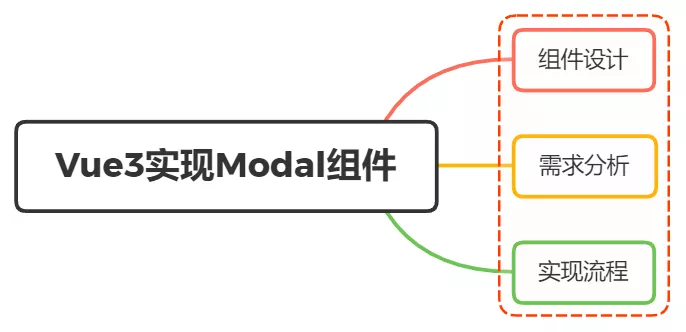
# 一、组件设计
组件就是把图形、非图形的各种逻辑均抽象为一个统一的概念(组件)来实现开发的模式
现在有一个场景,点击新增与编辑都弹框出来进行填写,功能上大同小异,可能只是标题内容或者是显示的主体内容稍微不同
这时候就没必要写两个组件,只需要根据传入的参数不同,组件显示不同内容即可
这样,下次开发相同界面程序时就可以写更少的代码,意味着更高的开发效率,更少的 Bug和更少的程序体积
# 二、需求分析
实现一个Modal组件,首先确定需要完成的内容:
- 遮罩层
- 标题内容
- 主体内容
- 确定和取消按钮
主体内容需要灵活,所以可以是字符串,也可以是一段 html 代码
特点是它们在当前vue实例之外独立存在,通常挂载于body之上
除了通过引入import的形式,我们还可通过API的形式进行组件的调用
还可以包括配置全局样式、国际化、与typeScript结合
# 三、实现流程
首先看看大致流程:
- 目录结构
- 组件内容
- 实现 API 形式
- 事件处理
- 其他完善
# 目录结构
Modal组件相关的目录结构
├── plugins
│   └── modal
│       ├── Content.tsx // 维护 Modal 的内容,用于 h 函数和 jsx 语法
│       ├── Modal.vue // 基础组件
│       ├── config.ts // 全局默认配置
│       ├── index.ts // 入口
│       ├── locale // 国际化相关
│       │   ├── index.ts
│       │   └── lang
│       │       ├── en-US.ts
│       │       ├── zh-CN.ts
│       │       └── zh-TW.ts
│       └── modal.type.ts // ts类型声明相关
因为 Modal 会被 app.use(Modal) 调用作为一个插件,所以都放在plugins目录下
# 组件内容
首先实现modal.vue的主体显示内容大致如下
<Teleport to="body" :disabled="!isTeleport">
    <div v-if="modelValue" class="modal">
        <div
             class="mask"
             :style="style"
             @click="maskClose && !loading && handleCancel()"
             ></div>
        <div class="modal__main">
            <div class="modal__title line line--b">
                <span>{{ title || t("r.title") }}</span>
                <span
                      v-if="close"
                      :title="t('r.close')"
                      class="close"
                      @click="!loading && handleCancel()"
                      >✕</span
                    >
            </div>
            <div class="modal__content">
                <Content v-if="typeof content === 'function'" :render="content" />
                <slot v-else>
                    {{ content }}
                </slot>
            </div>
            <div class="modal__btns line line--t">
                <button :disabled="loading" @click="handleConfirm">
                    <span class="loading" v-if="loading"> ❍ </span>{{ t("r.confirm") }}
                </button>
                <button @click="!loading && handleCancel()">
                    {{ t("r.cancel") }}
                </button>
            </div>
        </div>
    </div>
</Teleport>
最外层上通过Vue3 Teleport 内置组件进行包裹,其相当于传送门,将里面的内容传送至body之上
并且从DOM结构上来看,把modal该有的内容(遮罩层、标题、内容、底部按钮)都实现了
关于主体内容
<div class="modal__content">
    <Content v-if="typeof content==='function'"
             :render="content" />
    <slot v-else>
        {{content}}
    </slot>
</div>
可以看到根据传入content的类型不同,对应显示不同得到内容
最常见的则是通过调用字符串和默认插槽的形式
// 默认插槽
<Modal v-model="show"
       title="演示 slot">
    <div>hello world~</div>
</Modal>

// 字符串
<Modal v-model="show"
       title="演示 content"
       content="hello world~" />
通过 API 形式调用Modal组件的时候,content可以使用下面两种
- h 函数
$modal.show({
  title: '演示 h 函数',
  content(h) {
    return h(
      'div',
      {
        style: 'color:red;',
        onClick: ($event: Event) => console.log('clicked', $event.target)
      },
      'hello world ~'
    );
  }
});
- JSX
$modal.show({
  title: '演示 jsx 语法',
  content() {
    return (
      <div
        onClick={($event: Event) => console.log('clicked', $event.target)}
      >
        hello world ~
      </div>
    );
  }
});
# 实现 API 形式
那么组件如何实现API形式调用Modal组件呢?
在Vue2中,我们可以借助Vue实例以及Vue.extend的方式获得组件实例,然后挂载到body上
import Modal from './Modal.vue';
const ComponentClass = Vue.extend(Modal);
const instance = new ComponentClass({ el: document.createElement("div") });
document.body.appendChild(instance.$el);
虽然Vue3移除了Vue.extend方法,但可以通过createVNode实现
import Modal from './Modal.vue';
const container = document.createElement('div');
const vnode = createVNode(Modal);
render(vnode, container);
const instance = vnode.component;
document.body.appendChild(container);
在Vue2中,可以通过this的形式调用全局 API
export default {
    install(vue) {
       vue.prototype.$create = create
    }
}
而在 Vue3 的 setup 中已经没有 this概念了,需要调用app.config.globalProperties挂载到全局
export default {
    install(app) {
        app.config.globalProperties.$create = create
    }
}
# 事件处理
下面再看看看Modal组件内部是如何处理「确定」「取消」事件的,既然是Vue3,我们可以采用Compositon API 形式
// Modal.vue
setup(props, ctx) {
  let instance = getCurrentInstance(); // 获得当前组件实例
  onBeforeMount(() => {
    instance._hub = {
      'on-cancel': () => {},
      'on-confirm': () => {}
    };
  });

  const handleConfirm = () => {
    ctx.emit('on-confirm');
    instance._hub['on-confirm']();
  };
  const handleCancel = () => {
    ctx.emit('on-cancel');
    ctx.emit('update:modelValue', false);
    instance._hub['on-cancel']();
  };

  return {
    handleConfirm,
    handleCancel
  };
}
在上面代码中,可以看得到除了使用传统emit的形式使父组件监听,还可通过_hub属性中添加 on-cancel,on-confirm方法实现在API中进行监听
app.config.globalProperties.$modal = {
   show({}) {
     /* 监听 确定、取消 事件 */
   }
}
下面再来目睹下_hub是如何实现
// index.ts
app.config.globalProperties.$modal = {
    show({
        /* 其他选项 */
        onConfirm,
        onCancel
    }) {
        /* ... */

        const { props, _hub } = instance;

        const _closeModal = () => {
            props.modelValue = false;
            container.parentNode!.removeChild(container);
        };
        // 往 _hub 新增事件的具体实现
        Object.assign(_hub, {
            async 'on-confirm'() {
            if (onConfirm) {
                const fn = onConfirm();
                // 当方法返回为 Promise
                if (fn && fn.then) {
                    try {
                        props.loading = true;
                        await fn;
                        props.loading = false;
                        _closeModal();
                    } catch (err) {
                        // 发生错误时,不关闭弹框
                        console.error(err);
                        props.loading = false;
                    }
                } else {
                    _closeModal();
                }
            } else {
                _closeModal();
            }
        },
            'on-cancel'() {
                onCancel && onCancel();
                _closeModal();
            }
    });
}
};
# 其他完善
关于组件实现国际化、与typsScript结合,大家可以根据自身情况在此基础上进行更改
